
Overview
Tax Form Management can be configured to control where advocates submit their W-9, when collection begins, and how related emails are sent.
Click here for a more detailed overview of the Tax Form Management feature.
Before You Begin
- Tax Form Management must first be enabled for your account by your Account or Onboarding Manager, and you must be an Admin or another user role given permission to access it.
- Control whether your Tax Form Requirement settings apply to rewards by creating a Reward Rule per campaign and enabling the Require W-9 setting.
Step 1: Open Tax Form Management settings
- Go to Rewards & Payments → Tax Form Management.
- Click Settings.
- Review the available configuration options.
Step 2: Select where advocates submit their tax form
Choose where advocates will be directed from the request email to complete their electronic W-9.
Regardless of the option you select, Ambassador automatically opens a secure popup form that guides advocates through entering their tax information and providing an electronic signature. Learn more about the advocate tax form experience.
Note: You do not need to create a tax form widget, and it will not appear in your Widget Library. Ambassador manages the widget behind the scenes using a standardized global design. Because it includes specific functionality required to securely collect and process personal tax information, it cannot be customized.
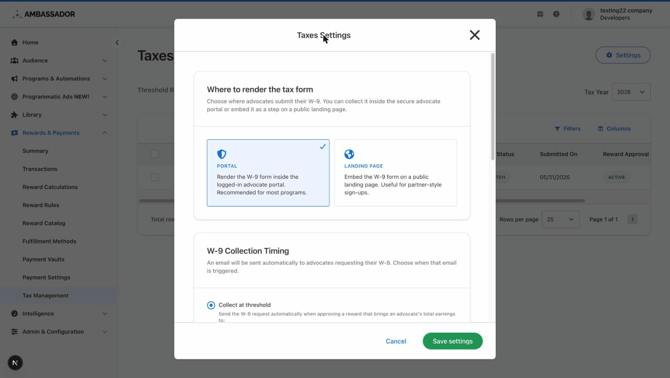
Option1: Advocate Portal - Send advocates to complete the form within their logged-in Advocate Portal, hosted by Ambassador.
This is the simplest option when advocates across all applicable programs and campaigns use the Portal.
Option 2: Landing page - Send advocates to complete the form from a landing page hosted by Ambassador or on your own website.
Choose this option when the Advocate Portal is disabled for one or more campaigns collecting tax forms.
When selecting a landing page, consider the following:
- For a single program or campaign, an existing advocate-facing page that already includes other Ambassador widgets may be a good fit.
- For multiple programs or audience types, such as customers and affiliates, consider creating a dedicated tax form landing page with messaging that is relevant to everyone.
- The landing page can be hosted by Ambassador or created on your own website.
- When using a page on your own website, the Ambassador JavaScript API snippet must be installed on the page to power the tax form widget. Users with the appropriate permissions can find the snippet under: Admin & Config > Integrations > Ambassador JS API
Step 3: Collection timing - when the request email is sent
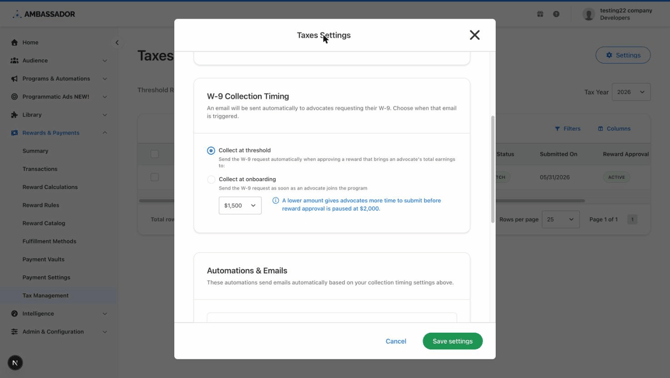
- Collect at threshold (default) — the request email goes out automatically when an advocate's earnings reach the collection threshold (choose between $500, $1,000, $1,500 or $1,750 — default $1,500). A lower amount gives advocates more time to submit before approvals pause at $2,000.
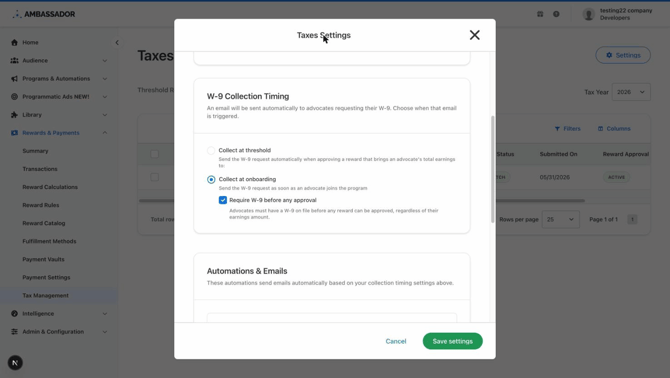
- Collect at onboarding — the request email goes out as soon as the advocate joins your program, so their W-9 is on file long before it's ever needed. You’ll need to include the
{w9_collection_link}in your welcome email.
- Require W-9 before any approval — If you’re collecting at onboarding, you can also enable this so that no reward is approved for an advocate until their W-9 is on file, regardless of how much they've earned. Use this if your compliance policy requires tax info up front.
Step 4: Select & Configure Automated Emails
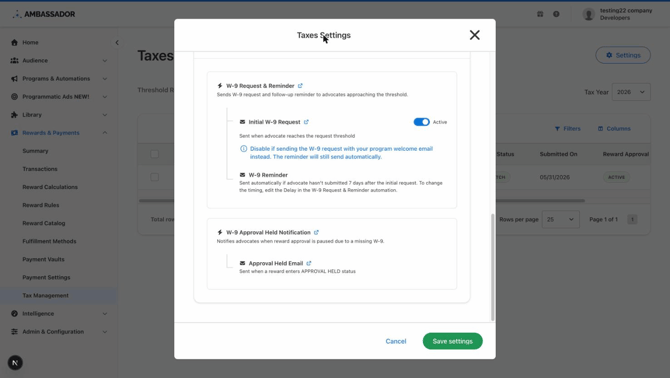
Select when the automated request and reminder emails will be sent:
- Initial W-9 Request - sent at the moment you chose above (threshold or onboarding). If you'd rather include the tax-form link in your program welcome email instead, turn this toggle off — the reminder below still runs.
- W-9 Reminder - sent automatically if the advocate hasn't submitted 7 days after the initial request. You can change the timing by editing the delay in the automation.
- Approval Held Email - sent when one of the advocate's rewards is put on hold, so they know exactly why and what to do.
When active, Ambassador will automatically create the necessary email templates and automations by default.
Email Templates: You can go to Library → Emails to customize these tax form related email templates.
- W-9 Request - Threshold (Initial) - Automatically added as an outcome with the W-9 Request & Reminder automation.
- W-9 Request (Threshold): Reminder - Automatically added as an outcome with the W-9 Request & Reminder automation.
- W-9 Request: Blocked (Rewards on Hold) - Automatically added as an outcome with the W-9 Approval Held Notification automation.
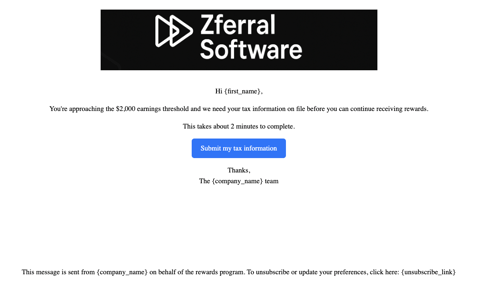
Automations: You can go to Programs & Automations → Automations to customize these tax from related automations if needed.
- W-9 Request & Reminder — asks the advocate for their tax info and follows up if they haven't submitted. Within this automation, the reminder is set to 7-days, which you can customize to meet your needs.
- W-9 Approval Held Notification — lets the advocate know when a reward is waiting on their W-9.
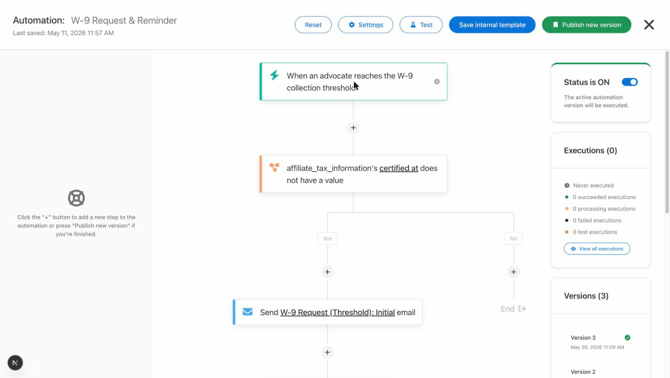
Step 5: Review & Save
- Review your collection location.
- Confirm when collection should begin.
- Confirm the selected collection threshold.
- Review the email automation settings. Don’t forget to customize the email templates!
- Click Save settings.
Step 6. Create or update your Reward Rule per campaign with Require W-9 setting enabled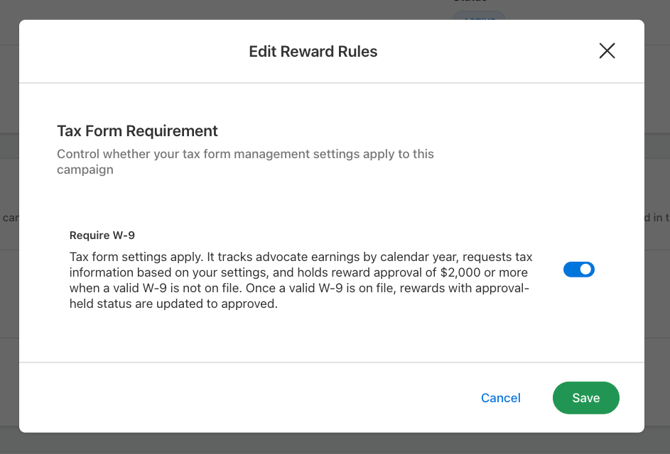
From here, Ambassador handles the asking, the reminding, and the holding for you, so nothing slips through before the $2,000 calendar-year limit.
Questions? Review related articles or contact support@getambassador.com.